

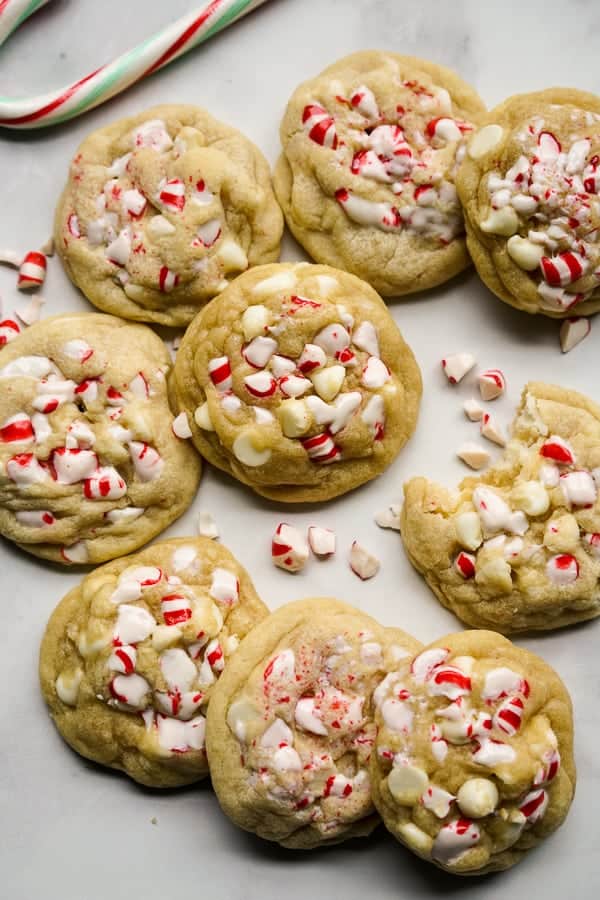
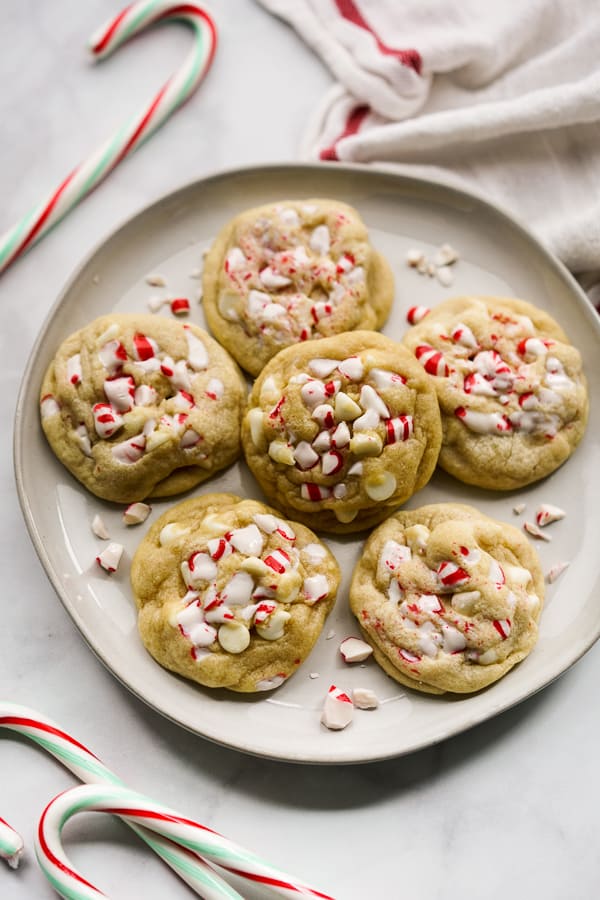
It’s the most wonderful time of the year! One that should be filled with lots of joy, fun, and holiday cookies! Or more specifically, these lovely White Chocolate Peppermint Cookies that scream Christmas, holidays, and all things merry and bright!
These chewy Christmas cookies are infused with delicious peppermint flavor, along with gooey melted white chocolate, and are soft with a touch of crunch. They even look festive and make the perfect sweet treat for the holiday season!

peppermint white chocolate cookies
This white chocolate peppermint cookie is a soft and chewy cookie flavored with minty peppermint from crushed candy canes, peppermint candies, or peppermint bark, and loaded with white chocolate chips. All of the Christmas and holiday flavors in one bite!
During the holiday season, I love to sit by my flocked Christmas tree with a peppermint white chocolate cookie in one hand and a good book in another. Or a TV remote about to start a Hallmark Christmas movie, if that’s your thing (I see you, sis).
While there are a lot of holiday cookie recipes out there, what sets these white chocolate peppermint cookies apart is how festive, fun and easy they are to make!
These peppermint white chocolate cookies are beautiful and perfect for Christmas parties, make great gifts for neighbors and friends, fun to make with kids, and just a delicious sweet treat I can munch on all day long.
So check out the cookie recipe below for the softest, fluffiest cookies filled with gooey white chocolate chips and fresh burst of peppermint pieces that provide a satisfying crunch.
I highly recommend eating them warm because warm cookies are seriously the best, or microwave them for a few seconds if they are not fresh out of the oven.
If you are in the mood for even more festive treats, check out my Cinnamon Raisin Rolls for those weekend mornings leading up to the holidays, Caramel White Chocolate Chip Chocolate Cookies for the tree and house decorating days, and Molten Chocolate Lava Cake for your Christmas dinner dessert!
100% guaranteed to put you in happy holiday mood. 🙂
ingredients
Here are the short list of pantry friendly ingredients you will need to make these white chocolate peppermint cookies:
- Unsalted butter: using unsalted butter helps control the amount of salt in our cookie recipe. If you use salted butter, you can omit salt.
- Granulated sugar: adds sweetness and promotes slight browning.
- Egg: acts as a binding agent, provides moisture, and adds richness for a softer cookie.
- Pure vanilla extract: enhances flavor and sweetness, adding depth to the overall cookie taste. You can also use other extracts such as peppermint extract in addition to this.
- All-purpose flour: holds it all together!
- Baking soda: this is our leavening agent to help our white chocolate peppermint cookies rise and spread.
- Salt: enhances the flavors of all other ingredients.
- White chocolate chips: I prefer white to milk or dark chocolate chips here for color and taste (such a good pairing with the peppermint), but don’t limit yourself!
- Peppermint pieces: chop up some peppermint bark or crush some candy canes, or get crushed peppermint patties. You can also use peppermint extract to enhance the flavor (a little of that goes a long way!).
How to make White Chocolate Peppermint Cookies
Here’s how easy this recipe is:
- One bowl – no need to separate dry and wet ingredients!
- No refrigerating of the dough
- Takes a total of 25 minutes!
And I’ve broken it up into just a few easy steps!
Step 0: Set the mood (Optional)
In the spirit of Christmas, break out some Christmas music in the background, light a Christmas candle, turn on the lights on your Christmas tree…and let’s get baking!
Step 1: Make the cookie dough
To make white chocolate peppermint cookies, first bring together all the wet ingredients – softened or room temperature butter, sugar, eggs, and vanilla extract, into a large bowl and give it a good mix.
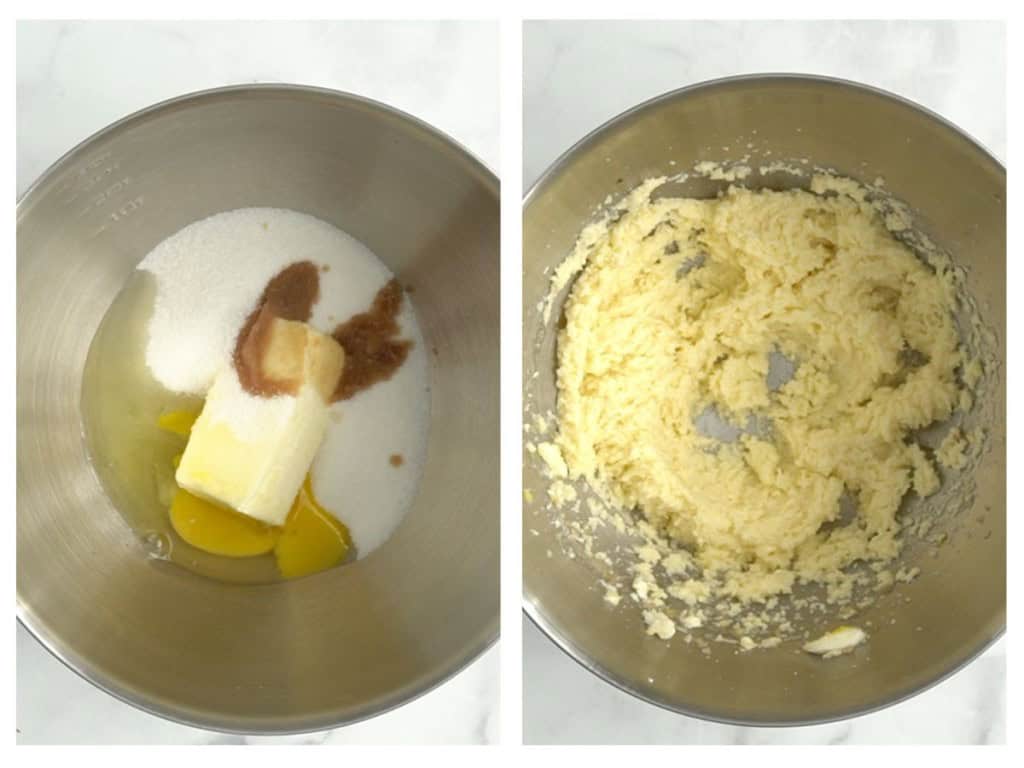
Then add the dry ingredients – flour, baking soda and salt.
You can mix this flour mixture separately before adding to the white ingredients, but it is not necessary. This way you’ll have one less bowl to wash! 😉
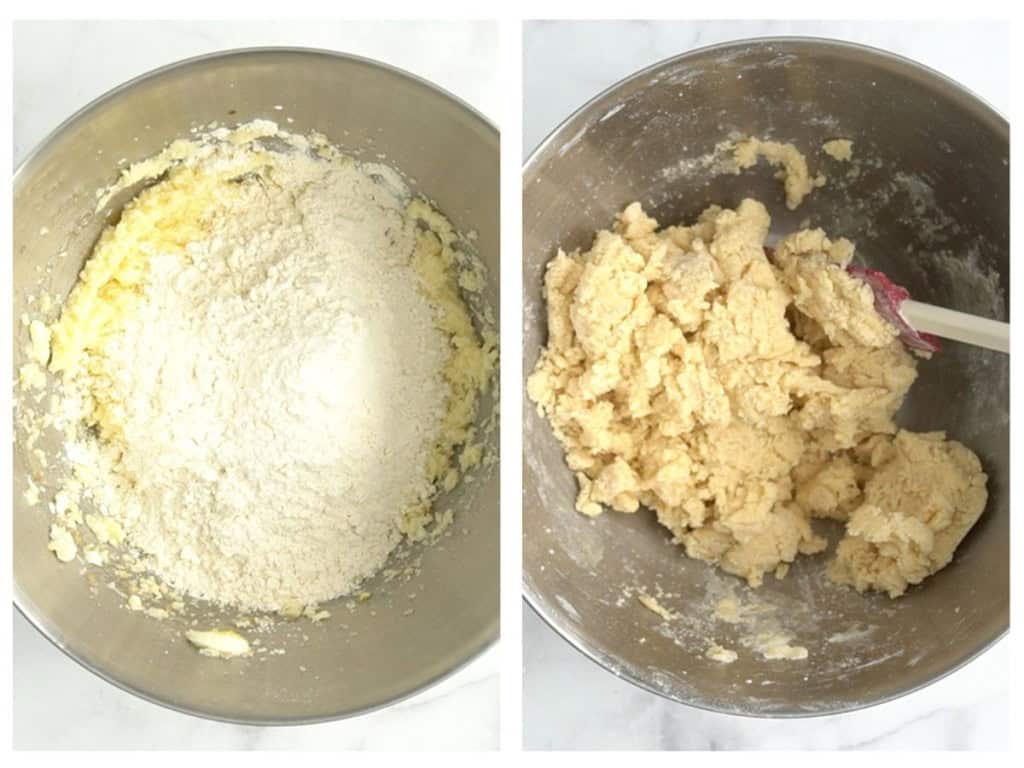
If you have a stand mixer, you can use it with the paddle attachment and mix at low speed, instead of mixing it by hand. Use a rubber spatula to occasionally scrape flour mixture from the sides of the bowl to ensure even mixing.
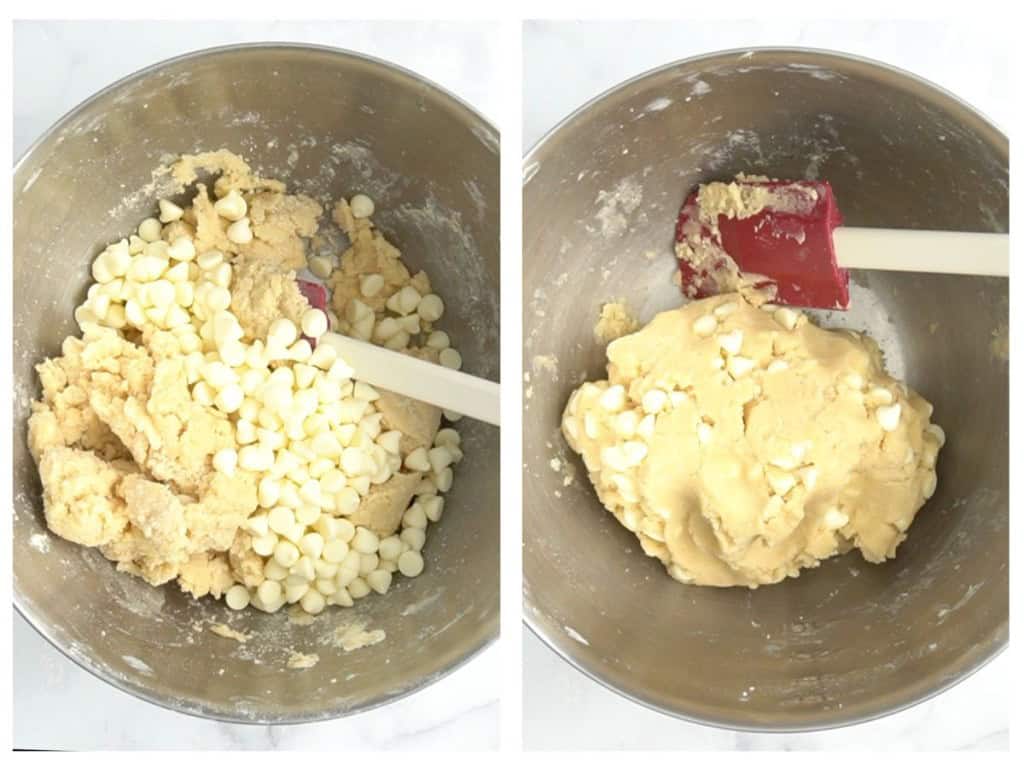
Next, fold in the white chocolate chips. Maybe pop a couple into your mouth. 🙂
step 2: Prep cookie Dough Balls
Get some peppermint pieces ready by crushing candy canes or peppermint candies, or chopping up peppermint bark.
Roll the cookie dough into about 18 small ~1.5-2 inch balls. Dip the tops onto the peppermint pieces. Then press the peppermint pieces down gently so that they sink slightly (but not completely) into the dough.
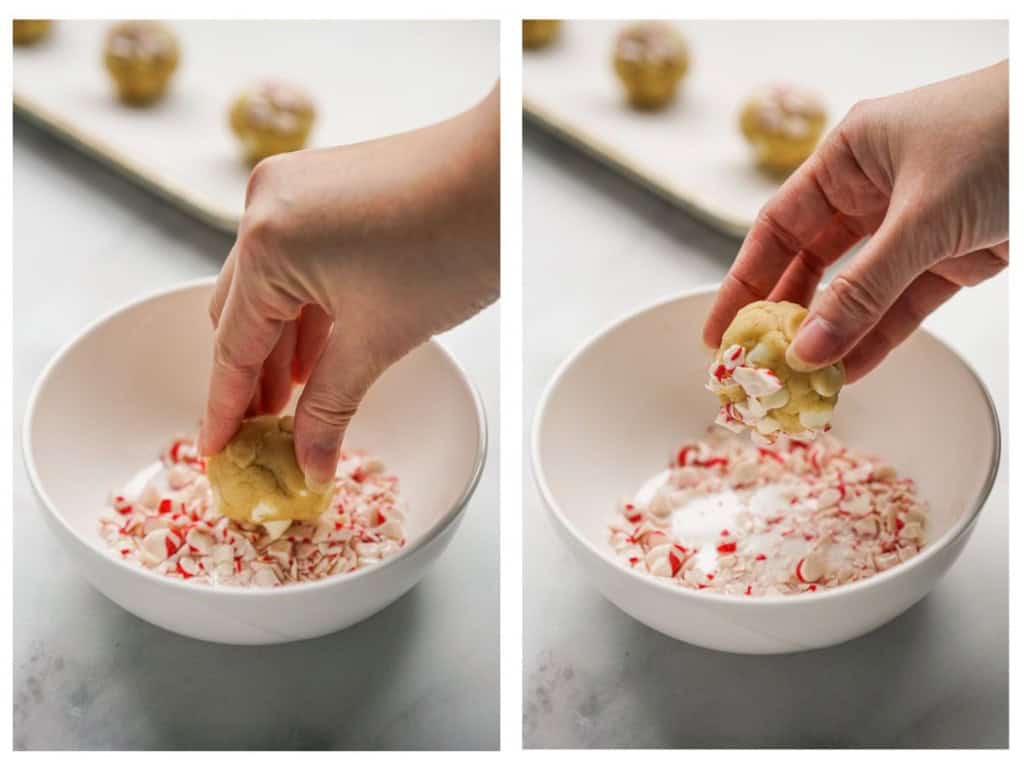
Alternatively, you can also use a rolling pin to roll out the dough and use cookies cutters to cut them into different shapes. If you have festive shape cookie cutters, this is a great way to make those fun Christmas cookies in shapes of Christmas trees, snowmen etc. After that, similarly, dip the flat cookies into crushed peppermint pieces.
Place them 2 inches apart from each other on a baking sheet or cookie sheet lined with parchment paper or a silicone baking mat – this makes cleanup a easier.
step 3: Bake!
Bake in the preheated oven for 10-11 minutes. Note that the cookies will still be slightly soft when done – we’ll let them sit on the baking sheet or mat for a couple of minutes so that they set. Then transfer to baking rack to cool.
Then comes the hardest part…waiting for them to cool so that they set nicely.
I hope you enjoy these soft, chewy white chocolate peppermint cookies!
And more importantly, I hope you have a relaxing, safe and joyful holiday season! 🙂
make ahead and storage
Make ahead: Prepare the cookie dough as directed up till forming into balls. Put the cookie dough into the refrigerator or even freezer, and only form them into balls/bake them when you are ready to bake and eat.
Storage: If you have leftovers (lucky you!), you can store them in an airtight container at room temperature for a few days, then store them in the fridge for up to a week.
Though peppermint white chocolate cookies never last that long in our household… 🙂
Tips and Tricks
- Portion control: Only roll a few doughs into balls, i.e. the ones you will be eating immediately. Put the rest of the dough aside to make later (see Make Ahead section above). Portion control now, more yumminess later! Win win!
- Enjoy while warm: I highly recommend eating them warm because warm cookies are seriously the best, or microwave them for a few seconds if they are not fresh out of the oven.
- Thicker cookies: if you would like a taller (thicker) cookie, refrigerate cookie dough for 20 minutes before rolling into small balls. This chill time will help the cookie dough set and prevent the cookies from spreading too when baking. Using softened (not melted) butter will help with it too.
- Adjust flavor intensity: if you prefer a stronger peppermint taste, add more peppermint pieces or a drop of peppermint extract. Or add other extracts for a variety of taste!
- Cook evenly: try to roll the cookie dough into balls of the same sizes so that they cook at the same time. Consistency is the key.
- Monitor baking time closely: ovens vary, so keep an eye on your cookies. They should have slightly golden brown edges when done.
- Do NOT overcook cookies: Check cookies at the 10-minute mark and remove them promptly from the oven if they ready. Cookies should still be slightly soft when you pull them out. Let cookies sit on the baking sheet for only 1-2 minutes. Remove using a flat bendable/more flexible turner/spatula (I find that non-bendable or wooden ones will break warm soft cookies) and cool on cooling rack. This is important because cookies will continue cooking on baking sheet. You want to remove it from the baking sheet after a few minutes so that it won’t overcook!
Frequently Asked Questions
No, there isn’t much difference. These are produced with the same ingredients in different shapes and forms. Use whichever you have on hand.
Refrigerate the dough for about 20-30 minutes to firm it up before rolling.
For softer cookies, reduce the baking time slightly. The cookies will continue to set on the baking sheet after being removed from the oven.
Try refrigerating the dough before baking, which makes the cookies thicker and fluffier. When butter is warm and fully melted, it makes the product flatter. Refrigerating it will harden it slightly.
Allow the cookies to cool completely on the cooling rack before stacking or transporting. The peppermint pieces will firmly adhere to the cookies as they set while baking in the oven.
ENJOYED THIS RECIPE? Tell us what you think by leaving a rating and review below! 🤍
Other Fun Holiday Desserts and Treats
- Chocolate Marshmallow Cookies
- Mini Chocolate Chess Pie
- Easy Apple Crisp
- White Chocolate Raspberry Cookies
- Strawberry Thumbprint Cookies
- Mint Chocolate Brownies with Andes Mint
- Cranberry White Chocolate Chip Cookies (by Savory Nothings)
White Chocolate Peppermint Cookies
Ingredients
- 1/2 cup unsalted butter softened
- 3/4 cup granulated sugar
- 1 large egg
- 1 tsp pure vanilla extract
- 1 3/4 cup all-purpose flour
- 3/4 tsp baking soda
- 1/2 tsp salt
- 1 cup white chocolate chips
- 1/3 cup peppermint pieces
Instructions
- Pre-heat oven to 350 degrees.
- Chop peppermint into small pieces until you have about 1/3 cup.
- In a large bowl, combine the wet ingredients – butter, sugar, eggs, and vanilla extract.
- Then add dry ingredients – flour, baking soda and salt. Mix well. Fold in white chocolate chips.
- Roll dough into about 18 small ~1.5-2 inch balls, then dip dough balls onto the peppermint pieces to coat the top of the dough balls. Press peppermint pieces onto dough balls gently so that they stay on, then place them on baking sheet lined with parchment paper.
- Bake for 10-11 minutes. Check at the 10-minute mark. Once it is done (it will still be slightly soft), let cookies sit on baking sheet for 1-2 minutes before carefully removing them and placing them onto a baking rack to cool for 10 minutes.
- Serve and enjoy!






all so easy to make wonderfull
I’m so glad you enjoyed it! 🙂
Excellent recipe, followed it to a T and it was perfect batter, baked right at the 11 minutes, and came out perfectly peppermint! This is a keeper!
Woohoo! Thank you so much!!
I questioned the melted butter…
Should have gone with my gut.
I melted the butter and now it is too soft to make into balls.
Perhaps edit to say “softened” butter??
Hey Shelby! Thank you for catching that! Softened is definitely better than melted. I just made the correction. And if dough is too soft refrigerating it can help harden it and get it to the correct consistency – hope that helps!
Hi MinShien! Thanks so much for this recipe. They are very easy, baked beautifully, and are delish! I added .5 tsp peppermint extract, and included some crushed peppermint stick in the batter. The butter was at room temp. You saved me today, because I had tried a similar recipe from another website and they melted all over the baking sheet. Yours is now my go-to 🙂 Happy Christmas!
Yay! So glad it was a success! Thanks for sharing and Merry Christmas to you as well! 🙂
How did you know that peppermint was my favorite?!?! These were delicious. Festive and so easy to make!
So perfect for the Christmas season! Glad you enjoyed it!
These cook look superb!! All I need are the candy canes and I can make these this week!
Thanks so much! Enjoy the cookies! Let me know what you think! 🙂
I mixed up a batch of these cookies and only baked a few. I put the remainder in the freezer. That is until my freezer pirate found them and almost finished off the dough! They’re delicious baked and my pirate says raw too.
Hahaha! That’s great Julie! Glad they taste amazing…baked or raw! 🙂
I baked them at 350 for 10 minutes with my rack on the center of the oven and my peppermint candies melted. Any advice on how to prevent that from happening?
They taste AMAZING just not as pretty as if the cadies didn’t melt.
Hey Julie! Hmm…I have used both the round peppermint candy and candy canes in the past and they didn’t melt. What kind of peppermint candy did you use? Another possibility I can think of it that oven temperature can be higher than what it seem and melts the candy pieces.
These are a big hit with our 3 grandkids. They will be on the Christmas cookie list again this year. I made a batch of these in bar cookie form and cut them in squares after cooled. I think they were better texture and were a hit as well. Thank you for the great recipe!
What a great idea to make them in bar form…Love it! Thanks for sharing!
These are so good. Peppermint is my favorite! I used dark chocolate chips instead of white – I just love dark chocolate! Perfect for Christmas!
Thank you! So happy to hear that!
Your recipe doesn’t mention when to add the white chips…
Just added it! Thanks so much for pointing it out!
It does
My husband absolutely loved these peppermint cookies! Thanks so much for sharing!
My pleasure! So happy to hear that!
Love peppermint cookies! My cookie jar is empty, so it is a great time to get to cooking!
You and me both! TIme to make some cookies!
Made these to try out and they were really delicious. Love the peppermint bits in the cookies. I’m going to make this when christmas comes for the family.
I’m so glad! Enjoy!
Oh I love a one-bowl cookie recipe! These were delicious and my kids and I had fun making them. Hard to resist eating just one! I love how festive they look too!
Thanks so much! Glad you and your kids are loving them!
Ooh!!! These soft and billowy cookies are absolute perfection! Love, love, love the peppermint crunch on top!
Thank you Sheila! It’s fabulous and so fun and festive! Glad you loved it too!
Can I make these in advance and freeze or refrigerate them overnight?
Yes! That should be just fine!
So good and I love that they weren’t chocolate based! Thanks for the recipe.
I’m so glad you enjoyed it! I love the vanilla flavors in the cookies too ! YUM!
Absolutely loved this recipe!
Thank you!! So happy to hear that!
The perfect Christmas cookie, festive, soft, chewy and DELISH! Made with salted butter, cause that’s what I had so just reduced the salt by a bit. Another great recipe from Joyous Apron! Thanks!
Thank you SO much for trying my recipes and I’m thrilled to hear you’ve been enjoying them 🙂