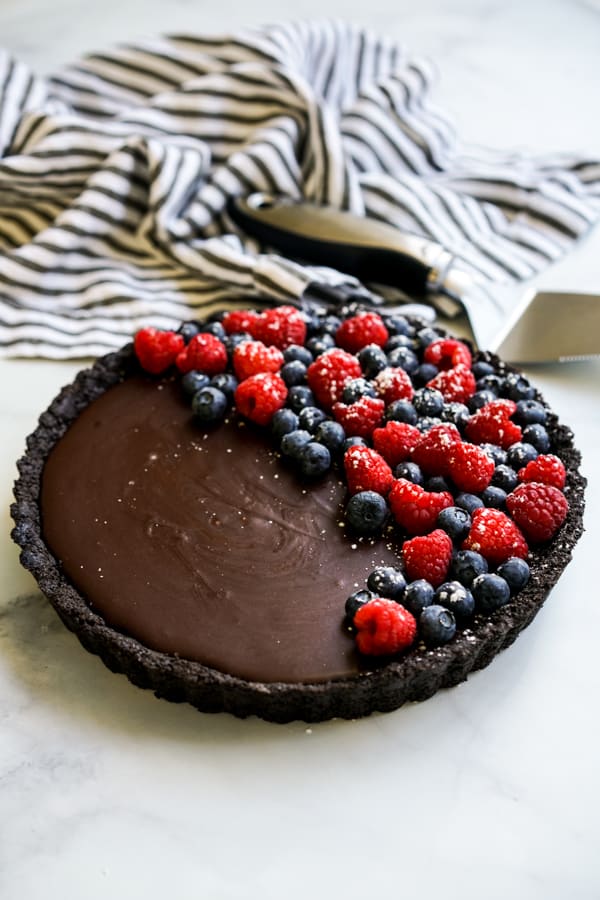
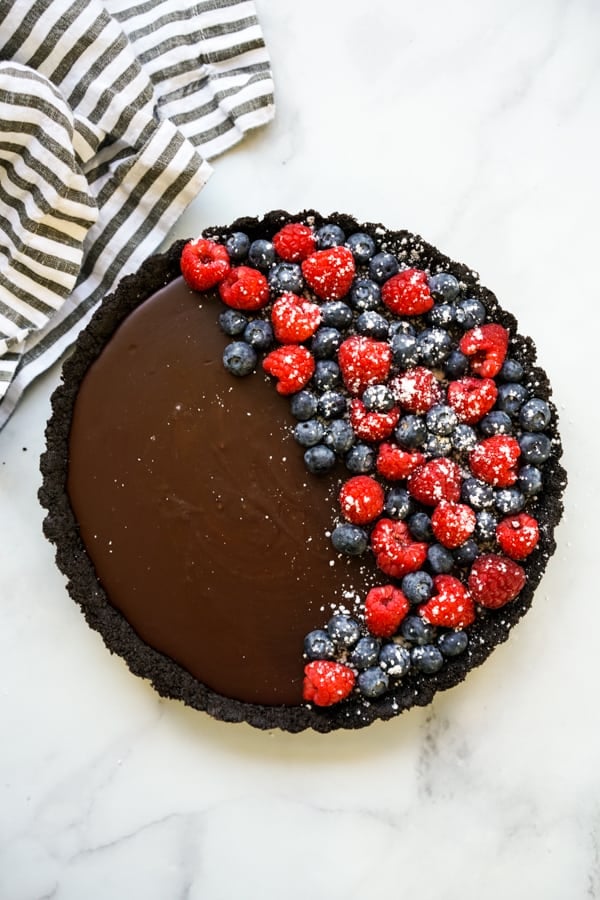
No-Bake Chocolate Tart is an elegant and delicious dessert that requires no baking. It has a rich and creamy chocolate filling and a crumbly Oreo crust, topped with fresh berries and dusted with powdered sugar.
It may sound all fancy…but you won’t believe how easy it is to make it!
Easy no-bake dark chocolate tart
If you are in the mood for rich, velvety chocolate ganache kinda dessert (but really, who isn’t?!), you are in for a treat!
Get ready to be blown away by this super easy No-Bake Chocolate Tart! Elegant, easy, and crazy addictive!
In terms of the chocolate filling, this is almost a Dark Chocolate Tart. The chocolate filling is rich, creamy, with a little sweetness to offset the cocoa.
My husband is addicted to this. He is a big dark chocolate fan and says it’s one of the best dessert I’ve ever made. And yes, he has gladly inhaled multiple tarts throughout this recipe testing and photographing process.
Here’s what you need to know about this recipe:
- No bake and 8 ingredients only! I love a good no bake dessert (e.g. this no bake cheesecake bites and this Oreo mint pie) – it just makes putting it together so much easier! Not having to pre-heat and turn on the oven is such a game-changer!
- Rich, velvety chocolate on Oreo crust is a heavenly combo
- So pretty without a lot of work! Impress your people with this no-bake chocolate tart! Bring it to potluck/dinner parties!
- Can be served cold or lukewarm, aka great party dish (can leave out for a few hours)
- Perfect for Valentine’s Day, which is around the corner! Something about the chocolate and berry combo, I think. Whether you are celebrating with a special someone, a bunch of girlfriends or family, no bake chocolate tart is great for the occasion. Also perfect for dinner parties or holidays.
Ingredient Notes
This easy no-bake dark chocolate tart is made with simple, pantry-friendly ingredients.
You will need a 9-inch round tart pan. It is very affordable and I highly recommend getting one with a removable bottom.
Here’s what goes into the dark chocolate filling of the no-bake chocolate tart:
- Chocolate chips – use semi sweet or dark chocolate chips. If you like your chocolate filling more milky, use milk chocolate chips
- Heavy cream
- Unsalted butter
- Granulated sugar
And here’s what you need for the crust for the no-bake chocolate tart:
- Oreo cookies
- Unsalted butter
As for toppings, I love berries with my chocolate, because I like the fruity taste and texture to contrast the rich and creamy chocolate.
You can also top it with pieces of shaved chocolate, whipped cream, ice cream, or skip the topping completely!
How to make chocolate tart
This no-bake chocolate tart requires no baking, and is super easy to make.
The only thing you need to do to prepare ahead is to make it a few hours in advance before you need it. Since it is a no-bake chocolate tart, we will need to refrigerate it so that it sits and solidifies.
Oreo Crust
To start, make the Oreo crust for your no-bake chocolate tart.
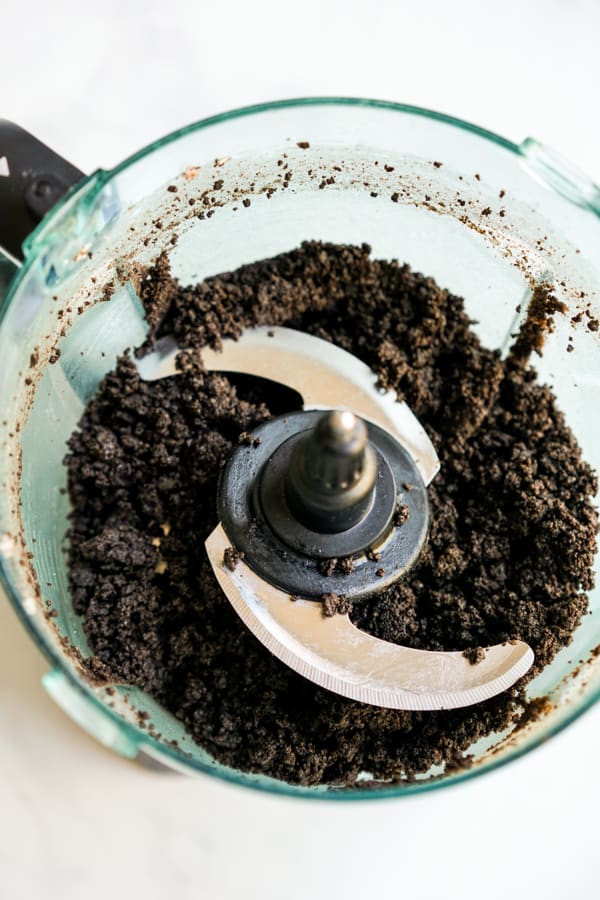
We will be combining Oreo cookies with melted unsalted butter, and here are two ways to go about it:
- Cut into it using a pastry cutter
- Pulse it using a food processor (by way the easier way! Takes seconds!)
When it is done, mixture should be slightly sticky, pretty fine, not big and lumpy.
Bring Oreo crumbles to a 9-inch tart pan and press crumble down to the bottom and sides of the pan.
You can do that using your fingers, a spatula, or the back or a flat measuring cup. Make sure to put pressure and shape the sides too!
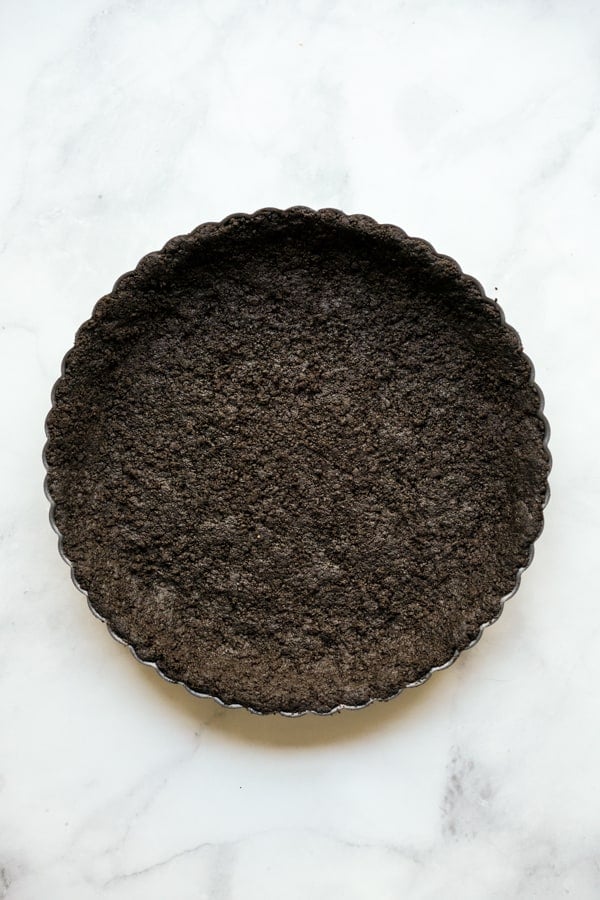
Once the Oreo crust is formed, I like to bring it into the refrigerator so that the crust will harden while I work on the dark chocolate filling.
Dark Chocolate Filling
Since we will not be baking the chocolate tart, we will be cooking the dark chocolate filling in a pot on the stove top.
This process is straight forward and quick. Basically we will be heating and combining all the ingredients for the dark chocolate filling in a pot. Once chocolate chips and sugar are completely dissolve, remove from heat promptly.
Pour chocolate filling onto tart pan with Oreo crust.

Then refrigerate your dark chocolate tart and be patient for at least 4 hours as it cools and hardens in the refrigerator.
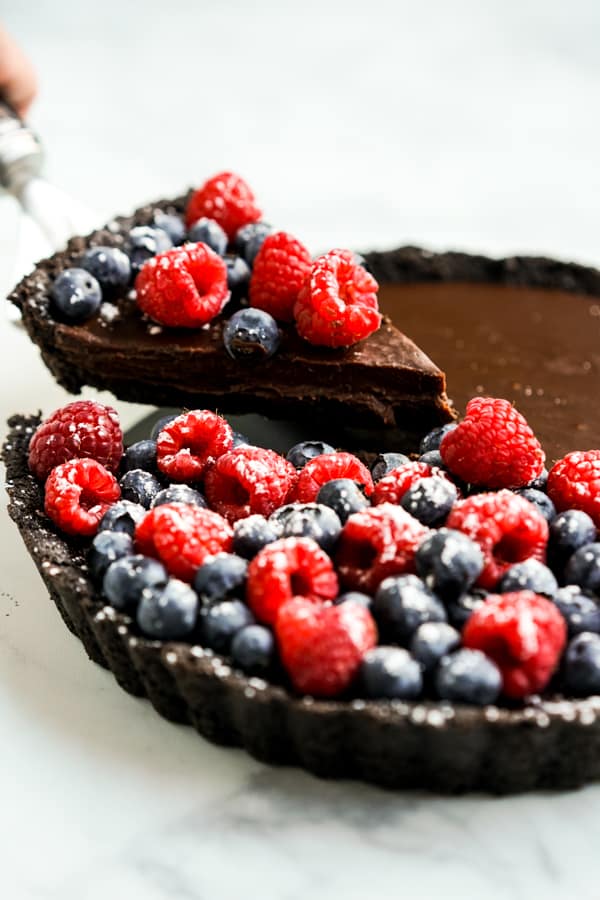
Gently remove no-bake chocolate tart from tart pan (the sides should disconnect from the bottom) and top with berries and powdered sugar.
And that’s all there is to it.
Rich and creamy, decadent and irresistible, super easy No-Bake Chocolate Tart.
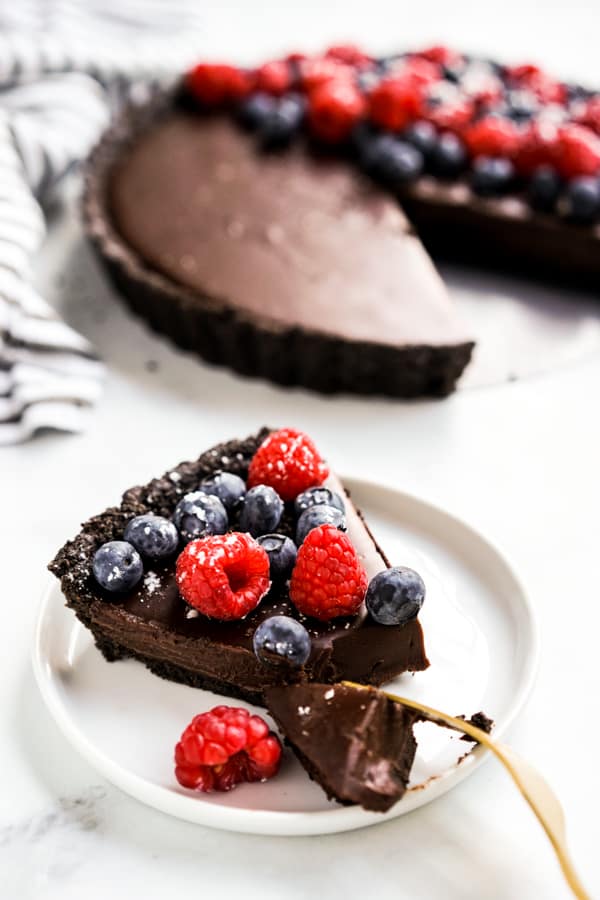
When you slice into it, chocolate filling should still be firm but creamy, and I adore the beautiful combination of that rich dark chocolate, crumbly Oreo crust and bites of berries.
Serve no-bake chocolate tart with more berries on the side, some whipped cream, or even a scoop of vanilla ice cream on top!
Tips and Tricks
A few quick notes from my trial and error:
- Use a tart pan with a removable bottom – it will make removal a lot easier. This is the one I have!
- When pressing Oreo crumbles onto tart pan, spread them out evenly and apply pressure on the bottom and sides of the pan. The sides take a little more work than the bottom. Once it is refrigerated, the crust will harden significantly because the butter will harden in the fridge.
- When cooking chocolate filling, cook under low heat and stir continuously to avoid burning the chocolate. Once everything is dissolved, remove from heat promptly. It does not have to come to a boil.
- Chocolate tart needs to be refrigerated for at least 4 hours or up to overnight to settle and harden. Do not cut short its time in the fridge!
- Chocolate filling is more dark chocolate than milk chocolate. If you want it less dark, add more sugar to taste. Taste the filling in the pot and adjust accordingly. Note that different chocolate chips will yield different sweetness as well.
Frequently Asked Questions
Store it in the refrigerator, preferably in an airtight container, for up to 5 days.
I highly encourage using heavy cream because the consistency of milk (or even half and half) is thinner and will make a difference to the recipe.
Add more sugar to the filling and/or use milk chocolate chips (instead of semi-sweet chocolate chips).
This No-Bake Chocolate Tart is a pure delight in every way! I hope you enjoy it! 🙂
ENJOYED THIS RECIPE? Tell us what you think by leaving a rating and review below! 🤍
More Chocolate Desserts!
If you love chocolate desserts (I do too!), check these recipes out as well!
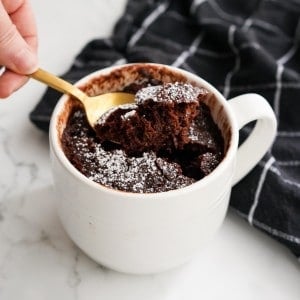
- Molten Chocolate Lava Cake
- Mini Chocolate Chess Pie
- Chocolate Cherry Brownies
- Banana Chocolate Chip Cookies
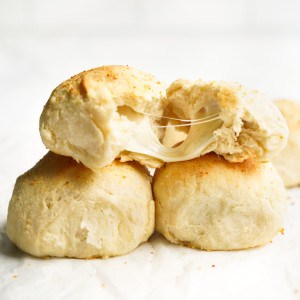
- S’mores Bars
- S’mores Ice Cream
- Strawberry Chocolate Cake Roll (by Tania at Cooking for my Soul)
No-Bake Chocolate Tart
Ingredients
Oreo Crust
- 25 Oreo cookies
- 5 tbsp unsalted butter melted
Chocolate Ganache Filling
- 1 1/2 cups semi-sweet chocolate chips
- 1 cup heavy cream
- 2 tbsp unsalted butter
- 2 tbsp granulated sugar more if needed
Topping
- 1 cup berries blueberries, raspberries, or strawberries
- 1 tsp powdered sugar
Instructions
Oreo Crust
- Combine butter and cookies by using a food processor (pulsing) or pastry cutter until mixture is very fine.
- Press Oreo crumbles onto a 9-inch tart pan. Make sure to spread crumbles out evenly and apply pressure on the sides and bottom (use fingers, spatula or back of a flat measuring cup).
- Refrigerate crust and set side.
Chocolate Filling
- Bring together all 'Chocolate Filling' ingredients into a pot. Heat on medium low heat and stir continuously until mixture is dissolved. It does not have to come to a boil.
- Taste chocolate filling, add more sugar if desired.
- Remove promptly once it is dissolved.
Combine
- Pour chocolate filling onto Oreo crust. Let it cool for 10 minutes, then refrigerate for ~4 hours or up to overnight.
- Top with berries and sprinkle berries with powdered sugar.
- Serve and enjoy!


We usually make lava cakes for Valentine’s Day, but decided to try the chocolate tart this year. Very easy and delicious!
Fun! Glad you all get to enjoy it for Valentine’s Day! 🙂
Oh my goodness, this tart was amazing — my family doesn’t mix chocolate and berries (I would have!) so I topped it with chocolate whipped cream swirls and shaved chocolate — over the top!
That sounds just as yummy!! Thanks for giving this a try! 🙂
Such a delicious dessert that everyone loved. Easy to make too.
Thank you Debi! Happy to hear that you all enjoyed it!
This made the perfect dessert for our family Christmas! Thank you!
Love hearing that! Thank you for sharing! Happy Christmas!
Hi, is the filling supposed to be hard when serving? I love this recipe and just made it but not sure if it should be fluffy or hard?
Hi Laura! The filling will be slightly hard after refrigerating for a few hours. It should soften after sitting out. It won’t be super fluffy – and you don’t want it to be fluffy – this way it will hold its shape when you cut into it!
I need to eat wheat free and dairy free so I made this with gluten-free oreos, dairy-free butter substitute, coconut cream, and dairy-free chocolate chips. I omitted the sugar in the filling also and it turned out great! I served it to friends yesterday and they left me only one slice for today. I will definitely be making this for special occasions.
Thank you for sharing your modifications, Barbara!
Just to confirm, that’s 25 whole Oreo cookies? Including the filling?
Yes! It’s 25 oreo cookies for the crust. No oreo cookies in the filling!
I meant does the white Oreo filling also go in the crust, sorry for the confusion and thank you!
Ahh that makes sense haha. And yes it does! Let me know how it goes when you make it! 🙂
Wow! This was so delicious. I did a trial run today because I need to take it to a wine pairing next week. They will be impressed. Can leftovers be frozen?
Yes! It can be frozen. So glad you enjoyed it!