

This decadent crustless Italian cheesecake is light and fluffy, made with ricotta cheese and cream cheese, is without a crust but instead surrounded by a sweet caramelized shell from baking in the oven.
Introducing my go to cheesecake recipe, this lovely Italian Ricotta Cheesecake, which in my humble opinion, is the best cheesecake ever. Like really truly the best kind of the best.
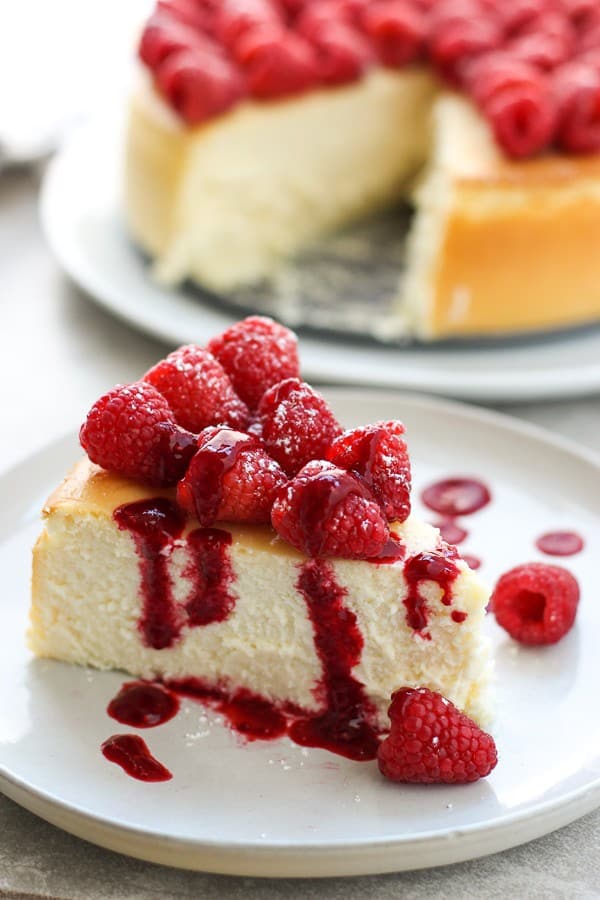
What is Italian Cheesecake?
This crustless Italian cheesecake is a recipe from my dear friend Diane, who inherited it from her Italian family. Diane used to make this all the time when we were roommates, and this ricotta cheesecake recipe is what made me fall in love with cheesecakes.
This has been my go-to cheesecake recipe ever since whenever the cheesecake craving hits!
Key marks of this delicious Italian cheesecake:
- Uses ricotta cheese so it has a rich flavor yet it is not overly heavy or dense. It is creamy, fairly light and slightly airy.
- It is crustless, which is typical of traditional Italian cheesecake. There is no graham cracker crust, but instead is surrounded by a caramelized layer formed after sugar and butter is baked in the oven. That sweet browned caramelized layer is my favorite part of this cheesecake – it brings a ridiculously beautiful texture and taste to contrast that creamy richness of the Italian cheesecake. And let’s be honest here, because it’s a crustless cheesecake, it’s one less thing to make!
- Incorporating sour cream gives it a slight citrus-y flavor, making the flavor more well-rounded, and balances out the richness and the creaminess.
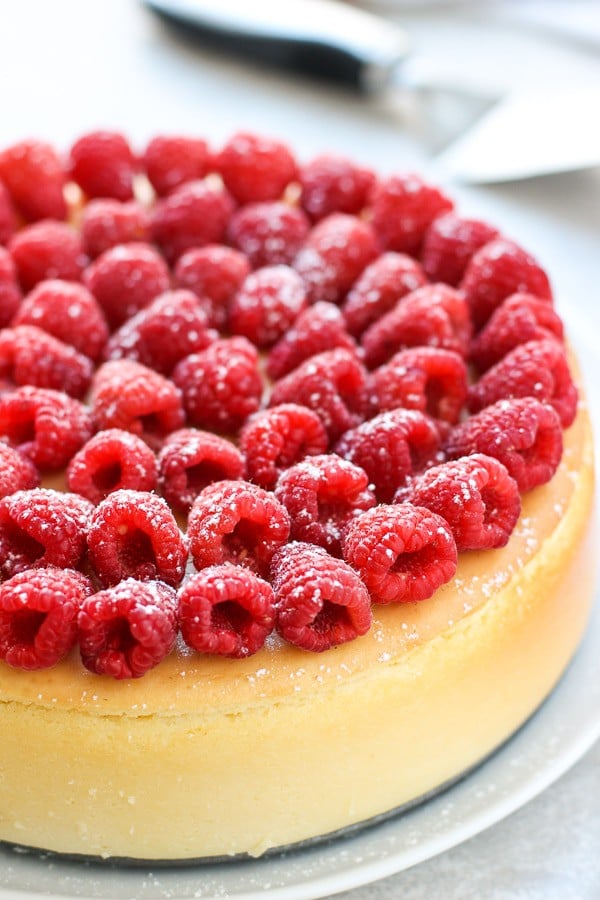
- Served with berries on top to balance out the rich and creamy ricotta cheesecake. You can serve it plain without the berries and sauce if you prefer, it is up to you.
There are so many versions of what you would call an Italian cheesecake, and this is one of them. Think of this as my take on Italian cheesecake, with notes and components from it, but it is not necessarily fully authentic.
Italian cheesecakes usually include ricotta and are typically lighter and fluffier compared to New York Cheesecakes, which are creamier and denser.
That lighter texture and the use of ricotta is what made me fall in love with Italian Cheesecake. And this crustless Italian ricotta cheesecake definitely pays tribute to that.
With the holidays coming up, Italian ricotta cheesecake is the PERFECT holiday dessert! Make this for Thanksgiving, Christmas, New Years’ Eve, and holiday parties!
But seriously, you don’t need a reason to crave this delicious crustless Italian ricotta cheesecake. If it is not the holiday season and you need some cheesecake in your life…I say make it anyway!! 🙂
Ingredients
This Italian ricotta cheesecake recipe calls for pantry-friendly, and a fairly shortlist of ingredients. And since it is crustless, I honestly think that makes it even more straight-forward!
Here are the ingredients you will need:
- Whole milk ricotta – You can use skim or non-fat ricotta but I think whole milk ricotta works better for our Italian ricotta cheesecake because it’s creamier.
- Cream cheese – Yes! We are using both ricotta and cream cheese for a lovely blend of flavors! Make sure to leave it out for a few hours so it’s softened before use. Opt for full fat cream cheese for best flavor. Avoid reduced fat.
- Sour cream – Brings a tangy flavor to the cheesecake and gives it a light texture. Bring it to room temperature before using if possible.
- Granulated sugar – Adds sweetness to offset the creaminess in the cheesecake and instrumental in crust caramelization.
- Eggs – Adds creaminess and serves as a binder. Room temperature eggs is even better.
- All-purpose flour – Used o thicken cheesecake filling.
- Pure vanilla extract – Use good quality pure vanilla extract to enhance overall flavor.
- Unsalted butter – Adds richness to the cheesecake.
- Lemon zest – Brightens up the flavors in our Italian cheesecake.
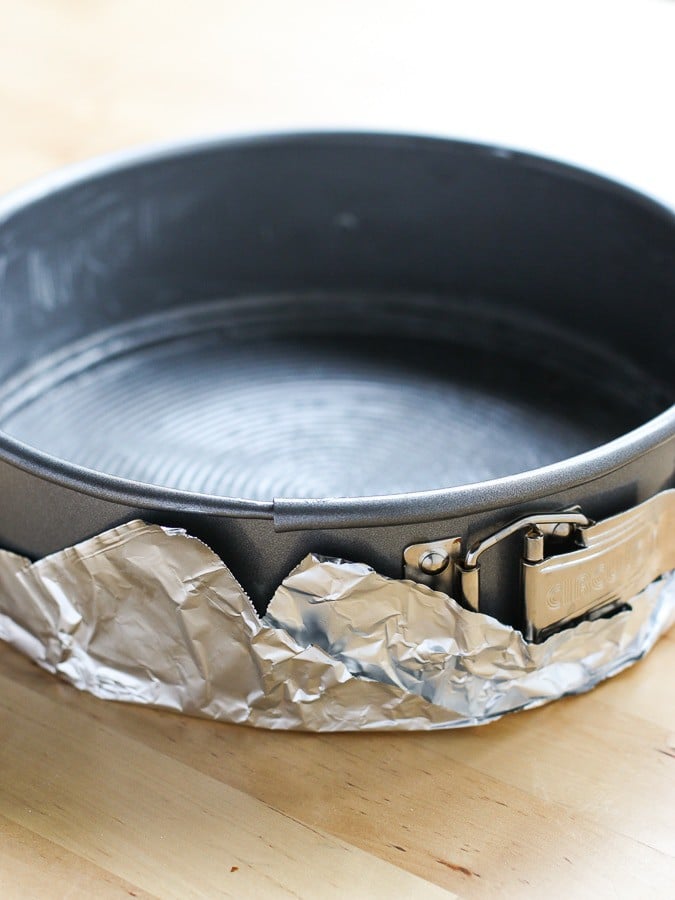
In terms of kitchen tools, you will also need a 9-inch round springform pan – so that you will be able to release the sides once the cheesecake is done, instead of having to dig the cheesecake out from the pan (Yeah, don’t do that…). These springform pans are fairly cheap and you can find them anywhere!
I highly recommend wrapping the springform pan with aluminum foil to prevent any leakage of liquid into the oven while it is baking. See picture below.
How to make crustless Italian ricotta cheesecake
While this crustless Italian cheesecake recipe is pretty easy to make and has a short list of ingredients, note that it does requires some time and a little bit of advanced planning.
In other words, if your cheesecake cravings hit and you hope to have your crustless ricotta cheesecake in the next hour, you are kinda out of luck.
It does take a few hours for this Italian ricotta cheesecake to set and cool and. But trust me, the wait IS ALL WORTH IT once you bite into this life-changing, as-good-as-gold, delicious cheesecake!
Step 1: whisk ricotta cheesecake Batter
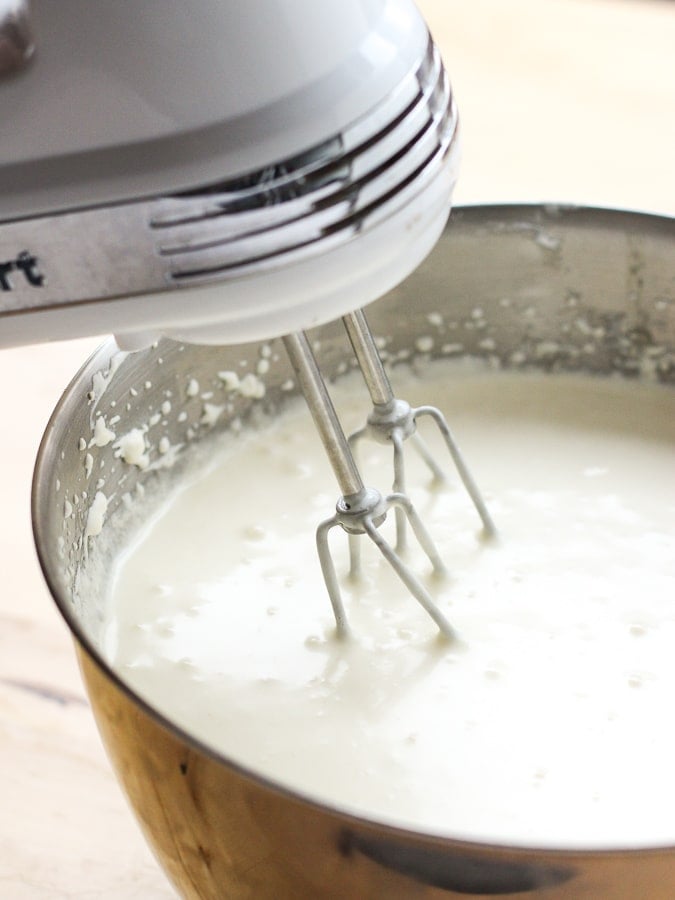
Let’s bring together the filling of our crustless ricotta cheesecake by whisking all the ingredients (ricotta, softened cream cheese, sour cream, sugar, eggs, flour, vanilla extract) in a large bowl until very smooth.
It is recommended to whisk this for 20 minutes. It does seem like a long time, but we really want the remove any clumps and our Italian ricotta cheesecake needs to be Smooth with a capital S.
Pro tip: if you have a stand mixer, it will make this part of the process a whole lot easier! Another option is to bring the cheesecake batter to a food processor and smooth it out that way.
Step 2: Bake & Rest
Next, grease spring foam pan generously with butter.
Once the ricotta cream cheese cheesecake filling is whisked well together, pour the filling into the prepared spring foam pan.
Bake Italian ricotta cheesecake in the oven for 1 hour. Make sure oven rack is in the middle of the oven.
And here’s a unique part of the process: when it is done, switch off the heat in the oven but do not open the oven door, and let cheesecake sit in the oven for 2 hours.
Cooling the cheesecake slowly (not dropping the temperature drastically while it cools), will lessen the cracking.
Step 3: Refrigerate and wait some more…
Remove from the oven and gently release the crustless cheesecake by removing the sides of the spring foam pan.
Your Italian ricotta cheesecake should have a nice golden brown exterior and be slightly soft and jiggly on the inside.
Keep the bottoms of the spring foam pan stuck to the crustless cheesecake and transfer to a cake stand or container, and refrigerate crustless cheesecake for up to 4 hours or overnight, until your Italian ricotta cheesecake firms up.
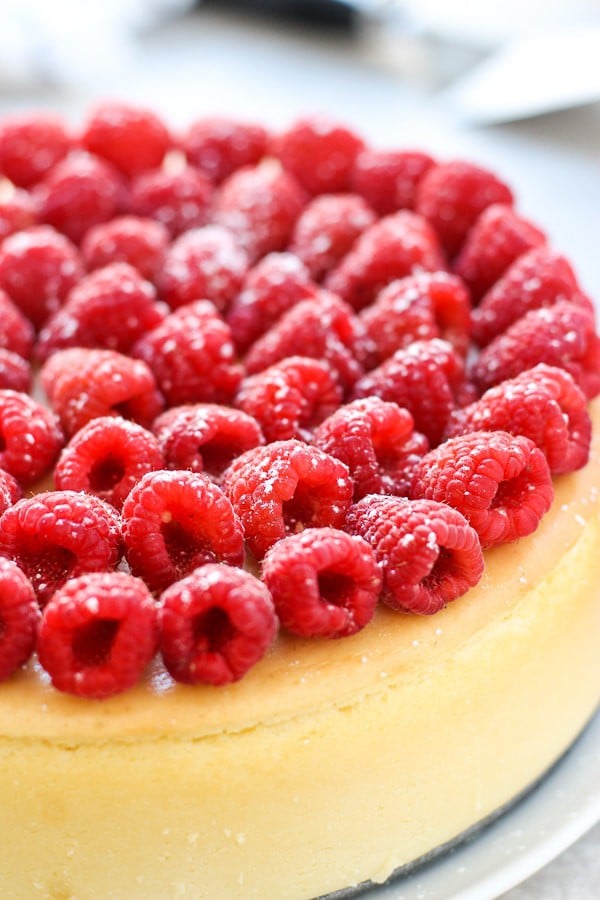
Step 4: Top with berries (or not…)
If you are a cheesecake purist and don’t do berries or toppings on your crustless cheesecake because it will hinder your Italian ricotta cheesecake experience, I actually kinda understand that and see where you are coming from. Especially when this cheesecake is amazing enough to stand by itself!
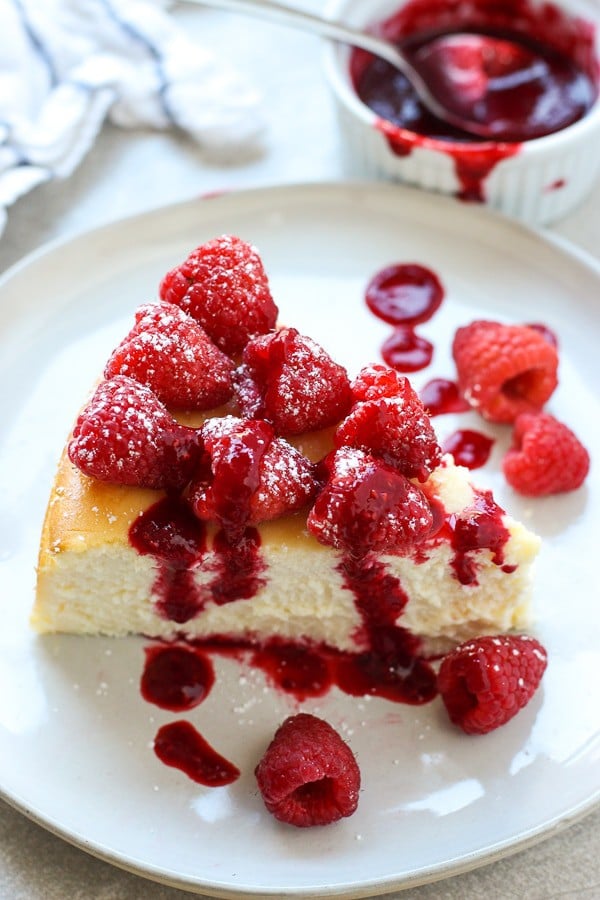
However, if you want to bring another layer of texture and flavor to further enhance the Italian ricotta cheesecake, top it with some fresh raspberries and make this incredible yet simple raspberry sauce recipe that goes perfectly with the cheesecake. It takes it OVER THE TOP.
If raspberry sauce isn’t your thing, try this strawberry topping instead!
Also, if you experience some cracking on the crustless cheesecake (because we are all humans, and cracking the cheesecake just happens!), the raspberries are the perfect way to hide it! 😉
Make Ahead and Storage
Considering the necessary refrigeration period, making the dessert a day ahead is actually preferable!
After taking the cheesecake out of the oven (following two hour cooldown), wrap cheesecake with aluminum foil and store in the refrigerator. Top with topping only when ready to serve.
To freeze cheesecake, wrap the cooled cheesecake (without toppings) well in plastic wrap, then place in a ziplock bag and freeze for no longer than 2 months. Ideally, it is better to eat cheesecake fresh if possible.
Tips and Tricks
A few tips and tricks when making this crustless Italian ricotta cheesecake:
- Use room temperature ingredients: Eggs, cream cheese, butter, and ricotta should be brought up to room temperature before use. This will allow them to be mixed without clumps and help in reaching the desired consistency of the batter.
- Beat until super smooth: Take the time to beat it up well so that the mixture achieves the perfect consistency, i.e. smooth, fluffy, and creamy. Use a stand mixture or electric hand mixture and whisk the ingredients on medium high speed for 20 minutes. Yes, it is time consuming and a lot of beating. But again – WORTH IT! 😉
- Reduce cracking: Drastic temperature changes cause cracking, so let the Italian cheesecake sit in the oven for 2 hours after it is done baking. However, cracking is still very possible! I will admit, I am not cheesecake expert – I have made this multiple times, and it almost always crack slightly on top. So if your cheesecake cracks a little bit, don’t fret over it! Top some berries on there and call it a day ;). Or just eat it as is, because I promise you, it will still tastes glorious. A water bath can be used, but it is not necessary with this method.
- Using a springform pan: This is a must! In addition, make sure to grease it with butter so that your crustless cheesecake doesn’t stick to it.
- Add the toppings right before serving: Wait until the very last moment to add fruit toppings; you don’t want soggy cheesecake!
Frequently Asked Questions
You can but it is not necessary. The purpose of the water bath is to make the cheesecake creamier and smoother, and also to reduce cracking. In this recipe, we circumvent these by whisking the mixture thoroughly for 20 minutes (to ensure the cheesecake is smooth and creamy), and letting the cheesecake sit in the oven for 2 hours after baking (to reduce cracking).
I’ve found that this is really effective in creating a creamy, smooth cheesecake texture and to prevent cracking later on as well. If you experiment with longer or shorter beating times, let me know what your results are!
Your cheesecake may have cracked due to overmixing or sudden cooling. To prevent overmixing, ensure the ingredients are at room temperature so they mix together smoothly. Let the cheesecake cool gradually in the oven for two hours to avoid cracking.
As long as the cheesecake is fully cooked and not overly raw, it is okay to serve a slightly sunken cheesecake. When you top it with jam and other toppings, no one will see! (Another reason for the toppings heh heh)
Any berries, cherries, jams, or fruit sauces work well with cheesecakes. Consider decorating with mint sprigs for a splash of color!
Store it in the refrigerator in an air tight container for up to 7 days.
Absolutely. Cheesecake freezes very well and the consistency shouldn’t change after freezing.
ENJOYED THIS RECIPE? Tell us what you think by leaving a rating and review below! 🤍
More delicious desserts
Since we are in fact in November, a.k.a. holiday season, check out these other fun desserts to make this holiday!
- No Bake Cheesecake Bites
- Easy Pumpkin Pie (with condensed milk)
- Mini Chocolate Chess Pie
- White Chocolate Peppermint Cookies
- No-Bake Chocolate Tart
- Individual Mini Peach Cobbler
- Chocolate Cherry Brownies
- Chocolate Marshmallow Cookies
- Peanut Butter Rice Krispie Treats
Italian Ricotta Cheesecake
Equipment
Ingredients
Cheesecake
- 16 oz whole milk ricotta
- 16 oz cream cheese softened
- 16 oz sour cream
- 2 cups granulated sugar
- 4 eggs
- 1/2 cup flour
- 1 tsp pure vanilla extract
- 1/2 cup unsalted butter melted
- 1/2 tbsp unsalted butter melted
- 1 tsp lemon zest from 1 lemon, optional
Toppings
- 1 cup fresh raspberries
- 1/2 cup raspberry sauce
- 1 tbsp powdered sugar
Instructions
- Pre-heat oven at 350 degrees F.
- Bring whole milk ricotta, softened cream cheese, sour cream, sugar, eggs, flour, vanilla extract, 1/2 cup melted butter into a large bowl. Mix well and beat on medium high speed (using a hand-held mixture or standing mixture) for 20 minutes.
- Butter springform pan with the other 1/2 tbsp of melted butter and wrap aluminum foil around the pan to prevent leakage.

- Pour cheesecake mixture into springform pan. Bring to oven and bake on the middle rack for 1 hour.
- Turn off oven and let cheesecake sit in oven for 2 hours. Do not open oven – we want to cool the cheesecake slowly.
- Remove cheesecake from oven. Cheesecake might be slightly jiggly in the middle. Gently release the sides of the springform pan from cheesecake.
- Refrigerate cheesecake in the fridge for another 4-5 hours, or overnight, until cheesecake is firm.
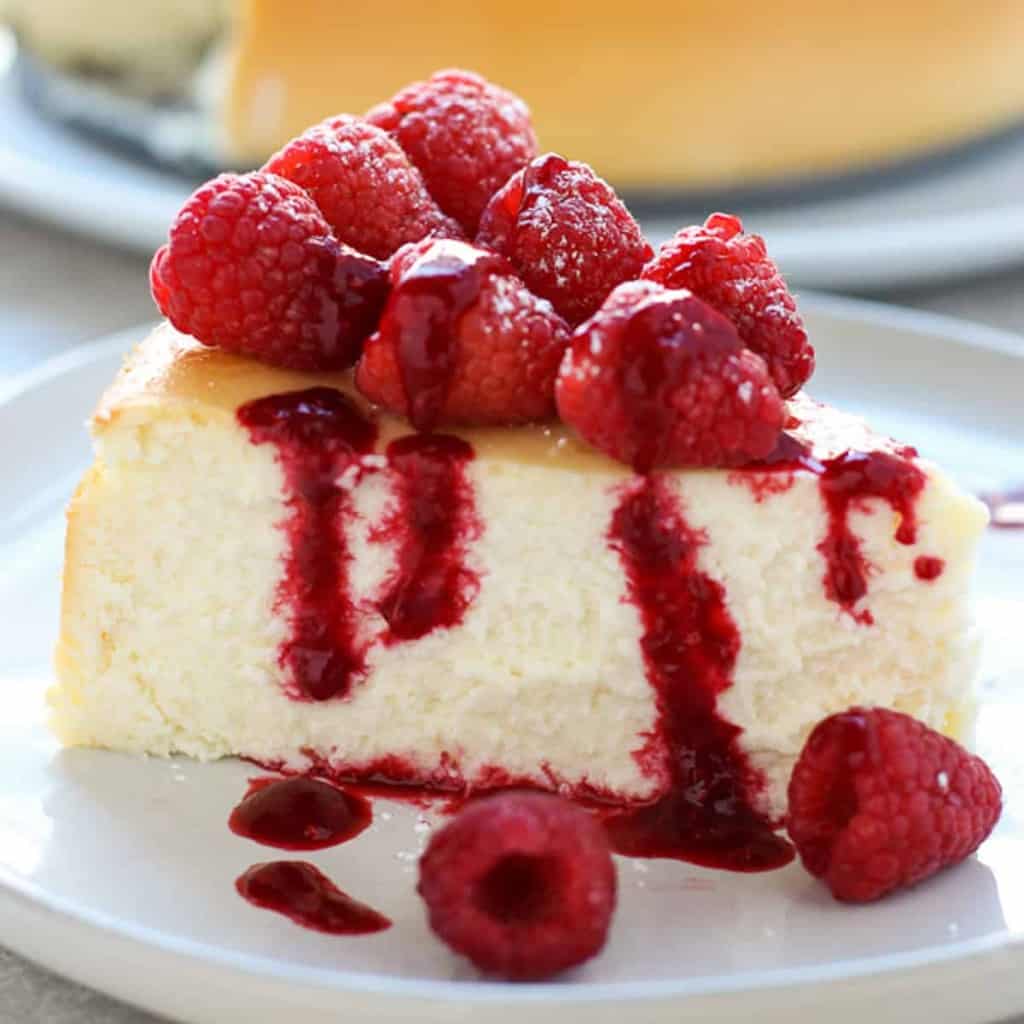
- Optional: top cheesecake with fresh raspberries, then sprinkle raspberries with powdered sugar. Slice and drizzle with raspberry sauce.
- Serve and enjoy!
Recipe Notes
- If ingredients are cold, bring it to room temperature first.
- Avoid dropping the temperature of cheesecake to prevent cracking – that’s why we are suggesting leaving it in the oven for 2 hours for it to cool.
- Water baths can be used but it is not necessary with the cooling-in-the-oven method.
- Cover cracked cheesecakes with berries and sauces! 😉 It has the benefit of making cheesecake super yummy with the additional toppings!

Delicious. Only issue I had was my dinner guests wanted more.
Haha that is a problem!! 😉
chef here- would have given 5 stars but 1 hr heated, 2 hrs with oven off is not correct. Cheesecake did not set in center (too wet). Should be
1- 1/2 hr heated, 2 hrs with oven off. TBS of lemon would be a great addition to the recipe.
My first time making a cheesecake. It rose slightly above the pan and cracked. What could’ve went wrong? It smells wonderful though.
It’s pretty normal for it to rise slightly and for some cracking! 🙂
Looks devine love chersecake
Thank you!
Why on earth would you beat this for 20 MINUTES? That’s crazy.
That’s to ensure the mixture comes out super smooth 🙂
What can I substitute flour with for GF option that does not have tapioca flour?
I’m sorry but I have not tried that before and don’t know the answer to that.
You can use rice flour. The most commonly used gluten-free flours are chickpea flour, almond flour, and rice flour. Other gluten-free flours that can be used as substitutes are buckwheat, cassava, coconut, corn, millet, sorghum, and tapioca. I know because my sister and my niece since they were younger, and after they found out, we had to find substitutes for gluten-free. Coconut flour is also a great alternative because it really doesn’t taste like coconut, but it adapts. Hope this helps!💚
Delicious! I added a little lemon zest and lemon juice. The sauce was a great combination. Thank you for this recipe. Definitely a keeper.
Thank you Angie! So happy to hear that, and love the lemon additions!
This is a keeper for sure. Made it Xmas eve to have for Xmas dessert and not only was it delicious for the intended meal it was even better with brunch the day after. Draining the ricotta overnight really makes a difference, don’t skip that step. I had a bit of trouble with the cream cheese clumping but that’s pretty standard when mixing with eggs or other liquid. Another post said to mix with sugar and then add remaining ingredients and that’s the best approach. The cook and rest time worked perfectly for me, for those with issues it might be a good idea to test your oven temp to see if it runs higher or lower then you set it at. Ovens can sometimes be a bit off. I was hoping to have some leftovers to freeze but there was not a crumb to be found so I’ll just have to make another. Terrific recipe and easy to make!
Thanks so much for all the tips, Chrissy! Happy to hear you enjoyed this recipe!
I agree 1 hour of baking was not enough. I extended the baking time for another 45 minutes. It turned out fine. This cake was very good and was well received by my neighbors. I wish I made 2 so everyone could have a piece. This cake is so decadent and addicting. However, I believe the secret was getting the real ricotta cheese from an Italian deli, that’s where I got mine.
Thank you.
Light and fluffy batter… its in the oven now. You must know this was more than my 9″ Spring form pan could hold…. in fact I have a 9″ and 8″ in the oven. I hope I didn’t do anything wrong. Good thing I have 2 Spring form pans! serving it to company tomorrow.
I hope so too! My spring fold pan has a high edge – so maybe that was the difference. I hope you enjoy this recipe!
Question?
I’m a little confused about the measurements; the recipe calls for 16 oz of sour cream, ricotta, cream cheese. So my measuring cup says 16oz is 2 cups however the density of those ingredients is a bit different so do I use 2 cups of each of those ingredients? or I tried a conversion calculator that says
16oz ricotta = 1 3/4 cups
16oz cream cheese = 2 1/8 cups
16oz sour cream = 2 cups
It’s the ricotta cheese I’m the most concerned about the measurements.
I did a quick google search and the ricotta measurement in cups looks correct to me! I shared the measurement in oz and basically used select typical sizes that these ingredients are sold in the store in the U.S.
You always measure by weight when baking. That solves all the problem.
Question?
Should I use the ricotta cheese as is or should I squeeze out the liquid first?
Use it as is!
I made this cake last week and the whole family loved it & I making another one tonight. So thank you for a great recipe.
Thank YOU for trusting it and making it! <3
Really good. It did take about 20 min. longer in the oven to get to just the center jiggling. That was all gone after the 2 hour cool down. I added Meyer lemon zest instead of vanilla. We ate it right away with blueberries and it will definitely be made again!
Thank you Regina! So glad you enjoyed it.
We love this Italian Ricotta Cheesecake recipe. So good and easy to make. The recipe seems very to cut in half to make a smaller cake. If I do that do I need to adjust baking times? Thank You
I imagine if you are cutting it in half and using the same size pan, you’ll want to cut down the time it takes to cook it, and also cut down the time to cool in the oven. Unfortunately I haven’t experimented it before so I cannot tell you the exactly time to cut down. Sorry! Please share if you do it though! It would be so helpful.
Can I get bake time please for using 2-6 inch springform pans? I can’t find my 9” one!
I haven’t made it that way so I cannot say for sure. However, if you want to try it, I suggest baking it for 45 minutes (with both pans in there side by side) and then letting it cool for 1.5 hours. Let me know if you try it and how it turns out!
Hey.. just made this today and after following steps exactly, when it came to releasing sides from spring form and removing from cake after sitting there for 2 hours, the entire cake just oozed into a lumpy mess. What did I do wrong? The whole thing is unfixable now . Is there a reason to not keep the pan on until cooled
Overnight?
I’ve made this in different ovens and it has come out fine. The only thing I can think of if you follow the instructions exactly is that oven temperature can vary so I would suggest getting an oven thermometer to make sure your oven is underheating. If the cake is still jiggle after the 2 hour cooling time in the oven, you can bake it for a few minutes longer to make sure it is set completely. I hope that helps! I’m sorry it didn’t turn out the way you had hope 🙁
I will be baking mine tomorrow my question is any adjustments needed for my high altitude I am a bit over 5,000 ft NW Albuquerque!
I’ve actually never baked in high altitude before but I do know that you need to increase the temperature slightly. This is a great article on what to adjust for high altitude baking! I hope that helps. Please let me know what you end up doing and how it goes!
Do you think I could add a crust to this? I just love the crust in cheesecake and would love to try this recipe
I think that should be fine!
I finally made this cheesecake and it’s definitely different from what I’m used to but delicious regardless. It came out perfectly and I’d make it again. My only tip is instead of beating the batter for 20 minutes make it with the traditional cheesecake mixing method and push it through a strainer to remove lumps. Quicker and easier and a good tip for anytime a batter isn’t smooth.
Thanks for sharing the tip! So glad you enjoyed this recipe.
I’ve made this recipe many times I actually bake @350 for 1 hr &
15 minutes then let it cool in oven for 2 hours and I use a 9 inch springform pan
It’s amazing delicious
Thank you for sharing, Marg! So glad you find it delicious. 🙂
I already know this is gonna be the best cheesecake I’ve ever made.
I did barter out the sour cream for heavy cream. That’s the only change.
I just put it in the oven and I’m so excited.
I was so impressed with the batter consistency❤️
Thank you, Lila! Enjoy your cheesecake! <3
i made this recipe amd followed it several weeks ago. it came out petfect. Beautiful height and color. not one crack. Smelled delicious. After reading reviews I was curious if it would be “falling apart” when the birthday girl cut it open. NOPE! it was perfect and she smiled and said mom it is really really good..so creamy. That was b4 her birthday lunch we had to stop her from eating it. Not kidding. I would post photos if I could just to show off how beautiful it was. I’m not a show off. I feel lucky I pulled this off the first time. Yes ladies, beat it for 20min. Worth it. I’m a chef too. 5 stars.
Add a little lemon juice if you like. I didn’t but thinking I will for the Lemon cheesecake I’m making for Easter. Wish I could share a photo.
Thank you Mary! You can share the photograph on Instagram and tag me there so I can see it! 🙂 So happy it worked out so well!
Delicious! I love cheesecakes without a crust; they seem more sophisticated! I associate graham cracker crusts with instant pudding desserts, that do have their place! Your recipes are the best! I have never gone wrong using them. Thank you.
Thank you Judy, your kind words made my day! Thanks you for making them and trusting my recipes!