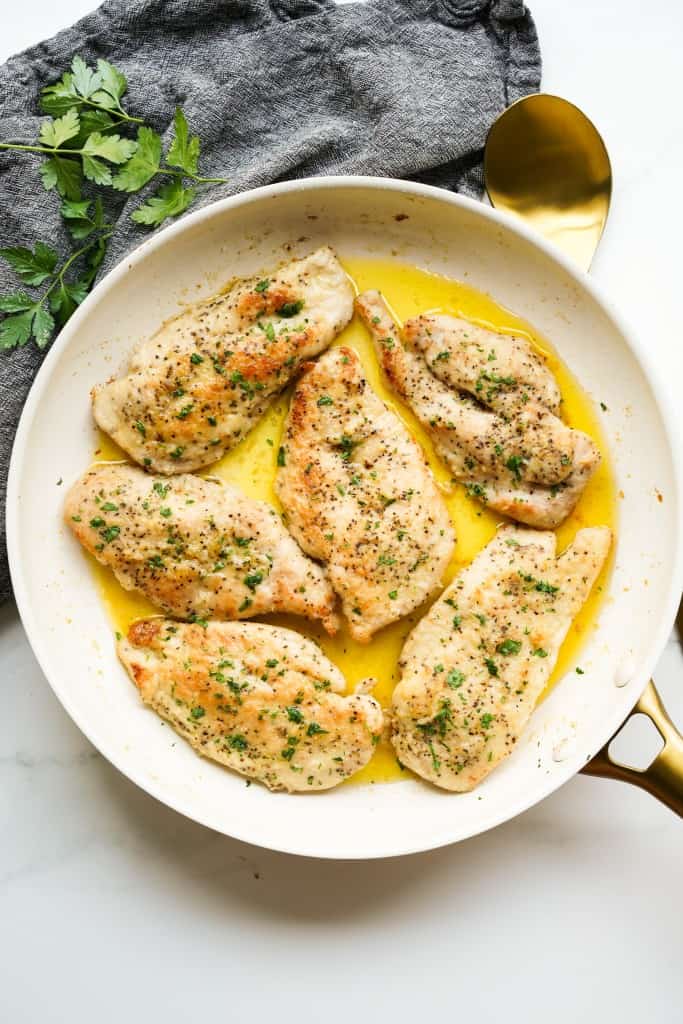
Garlic Butter Chicken Breast is one of those elegant dishes that tastes gourmet. Chicken breast is pan-seared then baked in creamy, decadent garlic butter, resulting in a tender juicy chicken soaked in buttery goodness.
And little will anyone know, it is actually a super easy one-pan chicken recipe that comes together so easily and quickly. It’s perfect for both an easy weeknight dinner or when you have company for dinner.
The Garlic Butter Chicken Recipe
When my husband and I visited Florence, Italy last year, we had the most amazing chicken breast dish soaked in bubbly garlicky butter served on a hot plate. I have dreamed about that chicken since the day I tasted it, so I set out to recreate it.
It honestly is such a simple dish – chicken with butter and garlic. There were no complicated seasonings in it, but the chicken is perfectly juicy, moist and tender. The flavors of the garlic butter doesn’t just linger on the surface, but permeates into the chicken. Every bite of chicken just melts in the mouth.
After multiple trial and errors, I decided to season the chicken and then lightly coat chicken with a flour mixture, we pan sear the chicken first to give it a light crust, and then bake it in the oven on an oven safe skillet. If you don’t have an oven safe skillet, you can transfer chicken to a baking dish to bake it.
Pan searing the chicken lock in the flavors and juices, while baking the chicken in garlic butter helps cook it slowly so it isn’t dry. Doing both ensure chicken comes out juicy, moist and very flavorful.
The amazing thing about this garlic butter chicken breast recipe is that is requires simple ingredients and basic cooking methods. Just pay attention to the instructions (don’t skip steps!) and use good quality ingredients…and you’ll be able to make this delicious chicken dish.
I cannot count the number of times I’ve made this garlic butter chicken breast since I perfected it. I serve it with roasted veggies, and sometimes with Pasta Pomodoro, potatoes or risotto. It has become a popular regular meal item in our home. We CANNOT get enough of it.
It’s truly one of my favorite chicken dishes ever and I’m so excited to finally be able to share it. Prepare to say goodbye to boring, dry chicken breasts forever!
Kitchen Equipment
You will need a skillet that is oven-safe to make this Garlic Butter Chicken Breast recipe. Basically a skillet that can be used both on the stovetop and in the oven.
Cast iron skillets are perfect for this.
Ingredient Notes
This garlic butter chicken breast recipe calls for only 7 ingredients – each one plays an important an unique role. The end product is a flavor-packed, juicy chicken dish that has quickly become a favorite of mine.
- chicken breasts – I use boneless, skinless chicken breasts. We will be butterflying chicken breasts (basically cutting it in half horizontally) so that it is thin, then searing and baking them. Butterflying chicken helps cook the chicken faster, and also increases the surface exposed to seasoning/sauce, which means, more flavorful chicken! Note that we will be using 6 thinly sliced chicken (or 3 chicken breasts in its entirety).
- salt and pepper – classic seasonings that enhances the natural flavors of the chicken.
- all-purpose flour – Dredging the chicken in flour helps create a golden-brown crust, adding a delightful texture to the chicken dish. Also helps thicken the sauce that will be baked with the chicken.
- butter – Use unsalted butter to avoid oversalting the dish. The creamy texture and rich flavor of butter is a perfect companion to the garlic.
- fresh minced garlic – Fresh garlic offers the best flavor, though garlic powder can be used if necessary. Cook garlic very briefly to prevent burning and to release its full aroma.
- parsley – Besides the aesthetic appeal, parsley also introduces a fresh hint of flavor that contrasts beautifully with the richness of the garlic butter.
How to Make It
Let’s chat about how to make this Garlic Butter Chicken Breast!
Butterfly the Chicken Breasts
First, using a sharp knife, slice through the thick part of each chicken breast and gently open it up like a book. This step increases the surface area and allows for even cooking.
Butterflying the chicken breast makes it thinner and you’ll end up with a smaller boneless skinless chicken to work with. In this recipe, I am calling for 3 large chicken that will coexist as 6 pieces of chicken after butterflying.
By doing this your chicken will also be better coated in garlic butter, will be more flavorful, and juicier when done.
Alternatively, you can purchase chicken breast that has already been sliced in half.
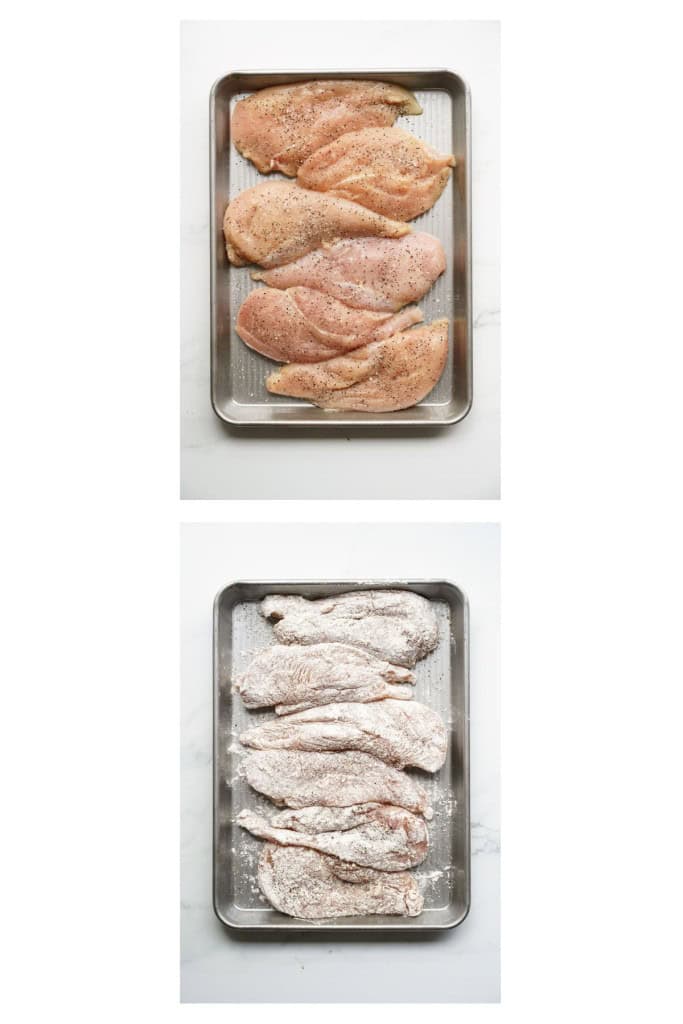
Season each butterflied chicken breast generously with salt and pepper on both sides and drench it in all purpose flour.
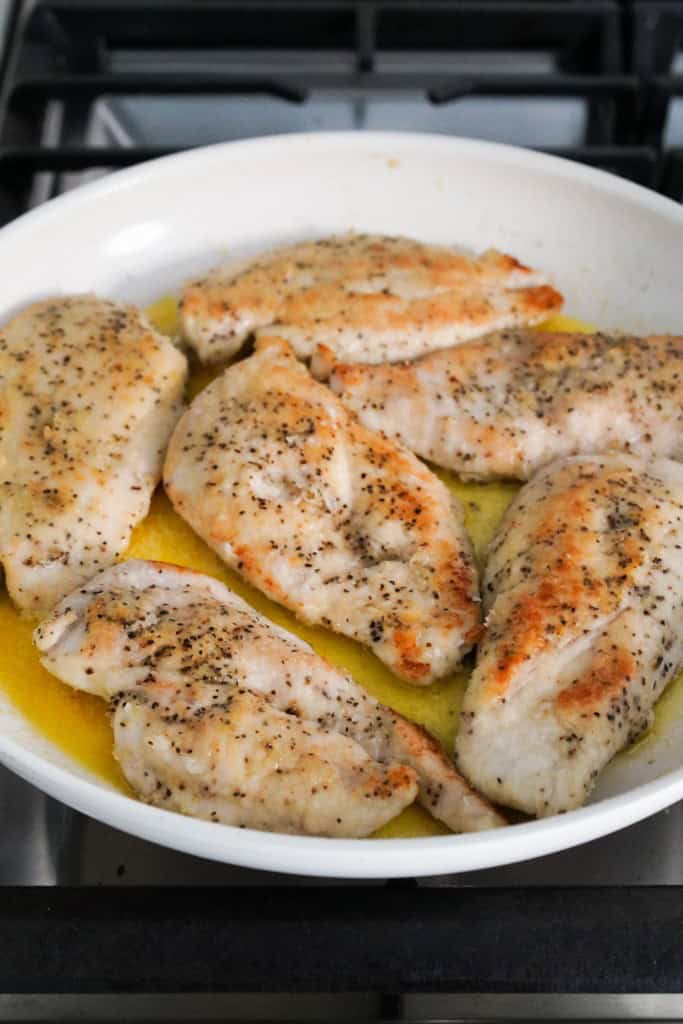
Sear Garlic Butter Chicken
In a skillet that is oven-safe (such as a cast iron skillet), drizzle with oil and once oil is heated, place the seasoned chicken breast to sear.
Sear each side of your butterflied chicken breast until golden brown – about 3-5 minutes, and remove chicken. We are not trying to cook the chicken all the way through, just browning the outsides.
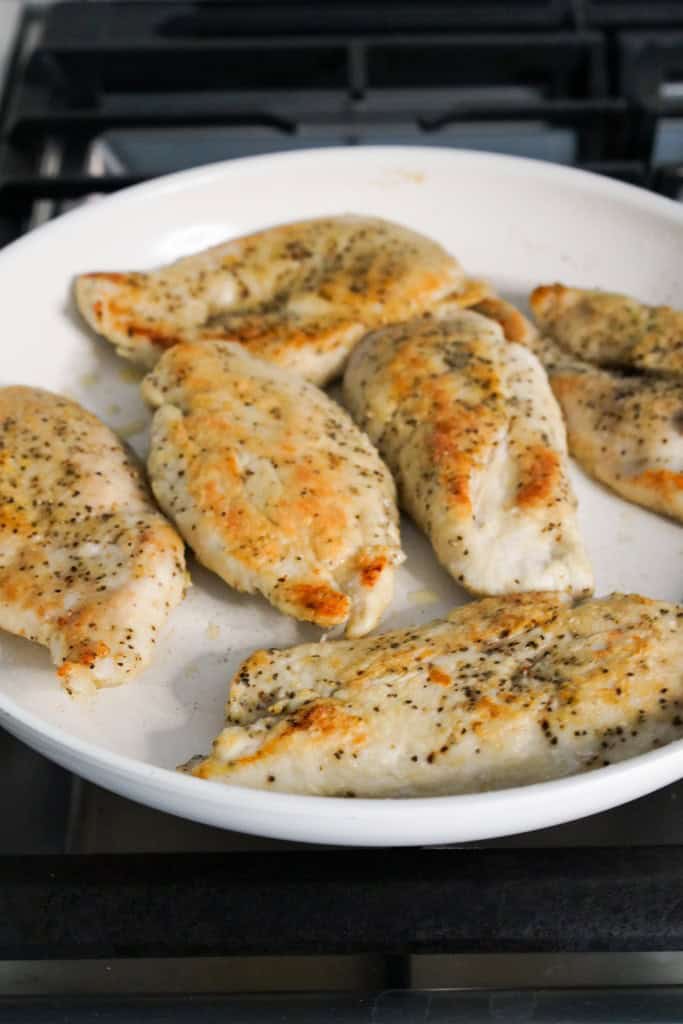
This searing process locks in flavor and moisture, ensuring that the chicken remains tender, adds texture, and also seal in the flavors of salt and pepper.
Once chicken is browned, remove from skillet and set aside.
Make Garlic Butter
Reduce the stovetop heat to low (or else you will burn the garlic), and add a few cubes of butter.
Melt butter and then add minced garlic. Stir to spread out garlic.
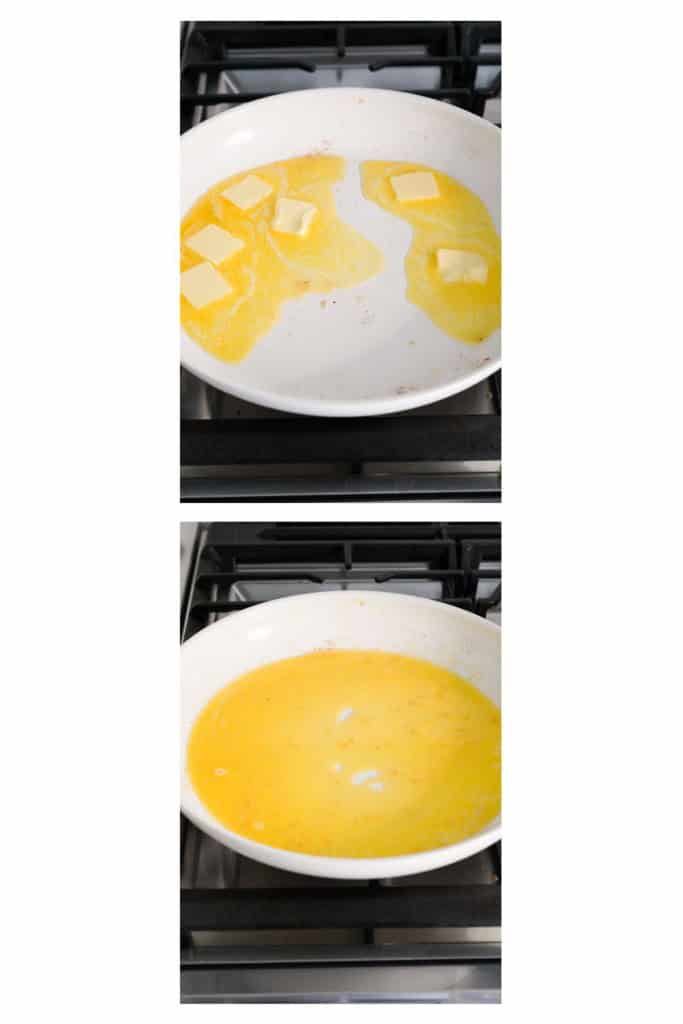
Do not let garlic sit in there for too long because we don’t want to burn or brown it.
Immediately add all chicken back into the cast iron skillet.
Bake Chicken
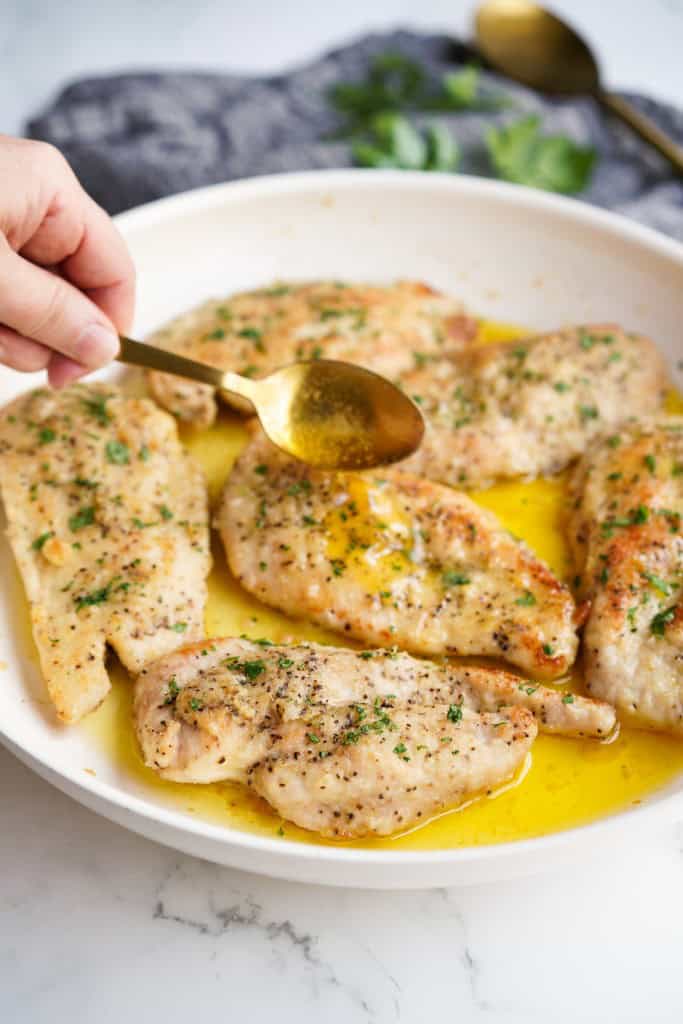
Spoon some of the garlic butter onto the tops of the chicken, and then place the whole skillet into the oven.
Bake garlic butter chicken breasts in the oven until they are fully cooked. Since chicken breasts have been butterflied, they are fairly thin and they should bake fairly quickly.
It typically takes a quick 7-10 minutes to bake it, but the time needed really depends on the thickness of the chicken and how long you cooked it on the stovetop.
Use a meat thermometer to make sure the thickest part of the chicken breast is 165°F before removing from oven. Also avoid overcooking because chicken will turn dry if overcooked.
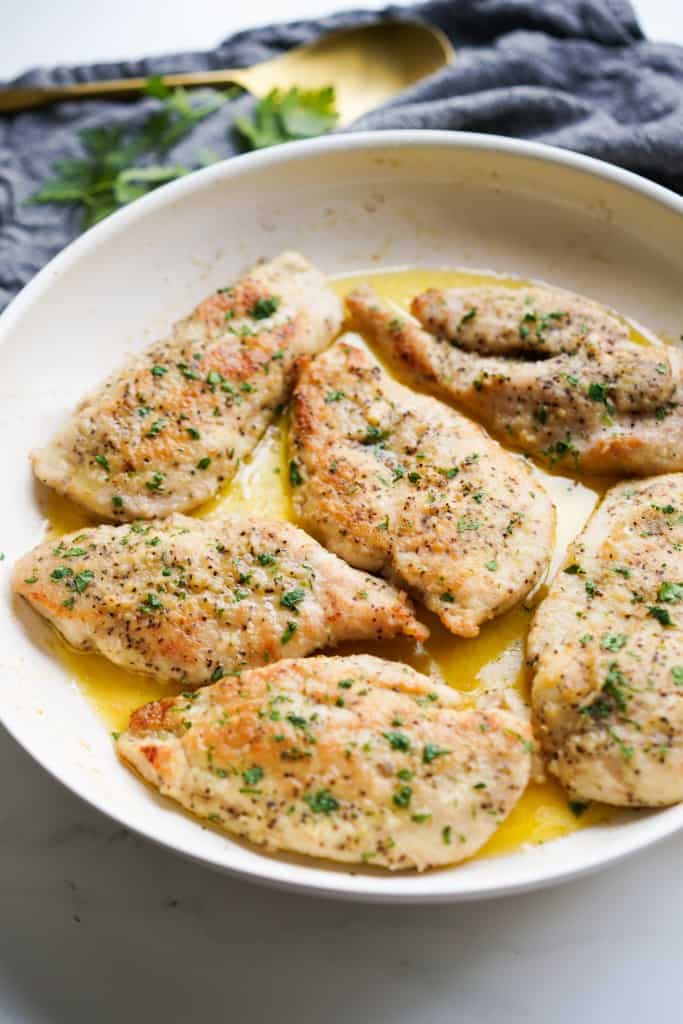
garnish and serve
Spoon some more of the garlic butter onto the chicken.
Then garnish garlic butter chicken breasts with some parsley and serve them warm.
Beautiful, succulent chicken that is so delicious, juicy and tender!
Garlic Butter Chicken is fairly easy to prepare and tastes unbelievably delicious. I know I say this often, but you are going to want to make this! 🙂
Tips and Tricks
- Butterfly the Chicken: To ensure even cooking and better flavor absorption, butterfly the chicken breasts. This will also help the chicken cook faster.
- Prepare Chicken: For more even cooking, make sure chicken is completely defrosted before cooking. Also, be sure to pat dry chicken before coating in seasoning and flour – this will ensure that they get a nice golden brown sear.
- Use Fresh Garlic: For the best flavor, always opt for fresh garlic rather than garlic powder or pre-minced garlic. Fresh garlic adds a more intense and aromatic taste to the dish.
- Don’t Skimp on Seasoning: Be generous with seasoning the chicken breasts with salt and pepper. Proper seasoning enhances the natural flavors of the chicken.
- Avoid Overcrowding the Pan: When searing the chicken, give each piece enough space in the pan. Overcrowding can lead to uneven cooking and a lack of browning. Do not overlap the chicken.
- Monitor Cooking Time: Keep a close eye on the cooking time to prevent overcooking, which can result in dry chicken. Chicken should reach an internal temperature of 165°F for safe consumption.
- Resting Period: Allow the cooked chicken to rest for a few minutes before slicing. This resting period allows the juices to redistribute, resulting in a juicier final product.
Variations
So maybe you are looking for something little different…
Here are some variation for this garlic butter chicken breast recipe:
- Use bone-in and/or skin-on chicken: Bone-in/skin-on chicken will take longer to cook through, so adjust cooking time accordingly. Sear until the skin is crispy. Alternatively, bring skillet to oven and bake at 375°F for 10-15 minutes to cook the chicken all the way through.
- Make it spicy: Add a pinch of red pepper flakes to the marinade for a fiery twist.
- Jazz up the sauce: Add a splash of white wine or lemon juice when searing the chicken to give the sauce an extra dimension of wine or citrus flavor.
- Adding veggies: Feel free to add vegetables before baking. You can add greens, mushrooms, tomatoes etc around the pieces of seared chicken before bringing everything into the oven. Note that it be harder to work veggies into the skillet if it is super full with chicken.
Storage and Reheating
Store any leftovers in an airtight container and refrigerator for up to 5 days.
To reheat, warm in the microwave until heated through.
Frequently Asked Questions
Butterflying the chicken, or slicing it thinly lengthwise, will ensure faster cooking and also enable more seasonings and sauce to come in touch with the chicken, making the chicken more flavorful.
The best way to ensure chicken is cooked is to use a meat thermometer. Internal temperature of the chicken breast should be at least 165℉ for safe consumption. However, avoid overcooking chicken as that will dry it out.
If you don’t have an oven safe skillet, use a regular skillet to sear the chicken and then transfer the chicken and the butter sauce into a baking dish. You may need to bake for a few minutes longer if using this method because baking dish will not be as hot as the skillet when it is placed in the oven.
You really don’t want to sear garlic for more than few seconds, and when you add garlic to the skillet make sure skillet is on low heat. Garlic will release its flavor when it is baked in the oven so there’s no need to cook it on the stovetop.
ENJOYED THIS RECIPE? Tell us what you think by leaving a rating and review below! 🤍
More Chicken Recipes
- Baked Pesto Chicken
- Chimichurri Chicken
- Chicken and Dumplings
- Air Fryer Chicken Teriyaki
- Chicken Rice Bowl

Garlic Butter Chicken Breasts
Equipment
Ingredients
- 3 large chicken breasts butterflied
- 3 tsp salt
- 1 tsp pepper
- ½ cup all-purpose flour
- 6 tbsp butter
- 5 cloves garlic minced
- 2 tbsp parsley minced, for garnish
- cooking oil
Instructions
- Preheat oven to 350℉.
- Heat an oven-proof skillet over medium heat. While skillet warms up, season both sides of the chicken breasts with salt and pepper.
- Put flour in a shallow dish. Dredge chicken in flour until evenly coated.
- Drizzle some oil in the hot skillet. Cook chicken breasts for 2-3 minutes on each side, until the chicken begins to brown. Remove from skillet once browned. Chicken doesn't have to be fully cooked at this point.
- Lower heat to medium low. Add butter and allow to melt. Once butter melts, add garlic. Stir to spread the garlic all over.
- Return chicken beasts to skillet and place in the oven.
- Bake for 7-10 minutes or until the internal temperature reaches 165℉.
- Spoon butter over chicken. Garnish with parsley.
- Serve and enjoy!


Great flavor combination goes great with mashed potatoes!
Omg YES! Best combo!
Omg you have me excited to try this, while I was reading your blog I felt excited loll. I will save this one for sure and let you know when I make it in the next week,
Thank you! Glad you guys had a great trip, saw your pics, you’re so sweet 🙂
Aw thanks Danielle! I can’t wait for you to try it! Please do let me know how it goes 🙂
Hi MinShien, Feedback for the Garlic butter chicken breast.
I made it yesterday, so very good! I made white rice and broccoli with it, drizzled some butter on everything. Moist chicken, yummmm lol
Thank you
Today we are celebrating July 1st, Happy July 4th from Canada!
Hi Danielle! Happy Canada Day! 🙂 I’m so glad you share my love of this yummy recipe! Thank you so much for sharing!
A good recipe , simple & easy to follow. Made it for dinner. It turned out really well. The chicken was tender & moist . We enjoyed it very much..
That’s wonderful! So glad you enjoyed the recipe!